Before vector animation hit the scene, back in the "traditional animation" days we created character color palettes in Animo (remember Animo?) We LOVE that there are character color palettes in ToonBoom ANIMATE!
A screengrab below shows that you can name the swatches and if you edit one color, then all drawings of that item painted with that color will change accordingly. There is also no confusion which color goes where. Color palettes are saved in a Palette library external to this file so you can easily share palettes with other artists.
I had actually created Rocquita color palettes in Toonboom DIGITAL PRO last year and imported them into this ANIMATE file.
Here are some screengrabs showing the Import Texture/Painting with Texture feature in Color Palettes.

To import a texture into the palette (In my case, it's the pattern of "stars" on Rocquita's tights), I generated a PSD file. I had already drawn this pattern in Flash so I exported the image to .bmp and saved as a .psd in Photoshop. I was originally going to create a "Mask" layer for every Leg drawing and add the stars this way, but it seemed like way too much work. This is so much more convenient! :)
Below is another example with our character Indigo, who wears a dark blue leopard print suit.
First the PSD file of the "leopard print"

I imported the PSD into my Palette and it generate a swatch which I renamed "indi suit print". Then painted the character as normal.

The texture fill naturally conforms to the shape that needs to be filled. So if you have a teeny weeny shape, you'll get teeny weeny leopard prints. If you have a large shape, the pattern increases in size... which was NOT what I wanted ... At first, the leopard print shape on Indigo's long pants were massive...

CLICK HERE TO SEE THIS LARGER
What's cool is that ANIMATE lets us edit the texture (scale, skew, rotate etc.) and then we can save the transformation to keep it consistent whenever we paint it.
Before you fill an area, click on the Enable/Disable Saved Texture button (I think this is what it's called) in the Paint Properties window. When Enabled is on, you get a consistent-looking pattern or texture regardless of what size the fill area is.
The screengrab above shows two sizes of leopard print - the top shape is using my Saved Texture size (same as Indigo's suit). The larger bottom shape has the feature disabled so the leopard print fill is much larger.
Drawing with invisible strokes
Our characters have no outlines and painting both strokes and fill areas is quite time-consuming. ANIMATE has a "flatten" tool feature so that you can merge outlines and fills that are the same color... but still.... you have to paint both first...
I was thrilled to learn recently that I can draw with "invisible strokes" in ANIMATE so I did this with my construction of Indigo. To draw with invisible strokes, create a Pencil tool setting with 0 width. In this case I was drawing with the Line and Contour Editor tools and I enabled the "Display Strokes" setting (keyboard shortcut = D) so that I could see my strokes.

CLICK HERE TO SEE THIS LARGER
I wish I had drawn Rocquita and Joe 101 this way (instead of using the Brush tool). Or maybe I could convert those brush strokes to pencil lines (I have yet to try this ANIMATE feature) to have more control over curves...

A screengrab below shows that you can name the swatches and if you edit one color, then all drawings of that item painted with that color will change accordingly. There is also no confusion which color goes where. Color palettes are saved in a Palette library external to this file so you can easily share palettes with other artists.
I had actually created Rocquita color palettes in Toonboom DIGITAL PRO last year and imported them into this ANIMATE file.
Here are some screengrabs showing the Import Texture/Painting with Texture feature in Color Palettes.
To import a texture into the palette (In my case, it's the pattern of "stars" on Rocquita's tights), I generated a PSD file. I had already drawn this pattern in Flash so I exported the image to .bmp and saved as a .psd in Photoshop. I was originally going to create a "Mask" layer for every Leg drawing and add the stars this way, but it seemed like way too much work. This is so much more convenient! :)
Below is another example with our character Indigo, who wears a dark blue leopard print suit.
First the PSD file of the "leopard print"
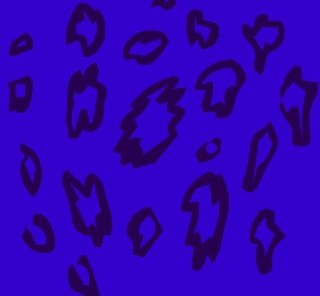
I imported the PSD into my Palette and it generate a swatch which I renamed "indi suit print". Then painted the character as normal.
The texture fill naturally conforms to the shape that needs to be filled. So if you have a teeny weeny shape, you'll get teeny weeny leopard prints. If you have a large shape, the pattern increases in size... which was NOT what I wanted ... At first, the leopard print shape on Indigo's long pants were massive...
CLICK HERE TO SEE THIS LARGER
What's cool is that ANIMATE lets us edit the texture (scale, skew, rotate etc.) and then we can save the transformation to keep it consistent whenever we paint it.
Before you fill an area, click on the Enable/Disable Saved Texture button (I think this is what it's called) in the Paint Properties window. When Enabled is on, you get a consistent-looking pattern or texture regardless of what size the fill area is.
The screengrab above shows two sizes of leopard print - the top shape is using my Saved Texture size (same as Indigo's suit). The larger bottom shape has the feature disabled so the leopard print fill is much larger.
Drawing with invisible strokes
Our characters have no outlines and painting both strokes and fill areas is quite time-consuming. ANIMATE has a "flatten" tool feature so that you can merge outlines and fills that are the same color... but still.... you have to paint both first...
I was thrilled to learn recently that I can draw with "invisible strokes" in ANIMATE so I did this with my construction of Indigo. To draw with invisible strokes, create a Pencil tool setting with 0 width. In this case I was drawing with the Line and Contour Editor tools and I enabled the "Display Strokes" setting (keyboard shortcut = D) so that I could see my strokes.
CLICK HERE TO SEE THIS LARGER
I wish I had drawn Rocquita and Joe 101 this way (instead of using the Brush tool). Or maybe I could convert those brush strokes to pencil lines (I have yet to try this ANIMATE feature) to have more control over curves...

